Tips and Tricks - General Civil3D
The Hierarchical Structure of Layers for Point Styles | |
Point Symbol Scaling in Civil3D | |
Labels with different Precisions <Go to Video> |
The Hierarchical Structure of Layers for Point Styles
If you wish to use layers to control visibility of labels, then you need to
turn off the Layer Override in the Key Description Table and allow the Point
Style layers to take effect. The downside of this is that when you list a point
it will always return that it is on layer 0, even though turning off the
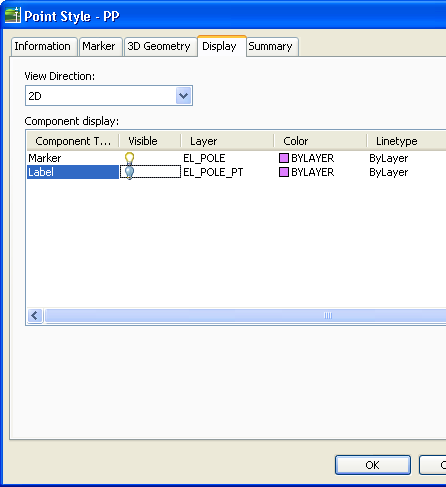
appropriate point style layer will effect the point. You will see from my
attached Point Style settings that the Power Pole is put onto 2 layers, but the
label information is not normally visible. I could make this visible in
the point style and control visibility with the layers, which is an option
available to me with this methodology.
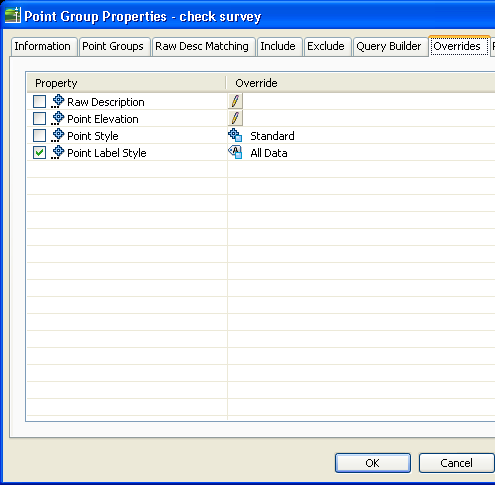
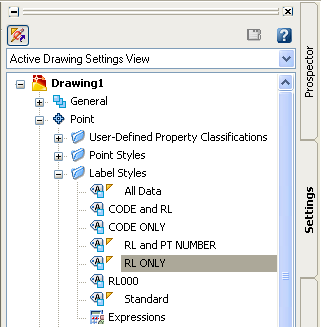
However, when I first import the survey information I want to see EVERYTHING. To
accomplish this I have a point group called checksurvey which includes all
points and has an override label style that displays all data. This group is at
the top of my group list in my template. See picture number 2.
When I want the points to look how I want when I plot, I go into Point Group
properties and simply move this point group to the bottom of the list of
pointgroups.
 |
 |
When you get used to it, it is very efficient.
As I said, you can accomplish this with disabling the layers in the Key
Description Table, but I like to see the object layer when I list it, so that
option was out.
Point Symbol Scaling in Civil3D
To get the point symbols to automatically rescale in a viewport, you must have the Key Description and Point Style settings working together.
The Key Description Setting firstly: Notice the Use Drawing Scale is turned off here.

Now the Point Style for SMH:
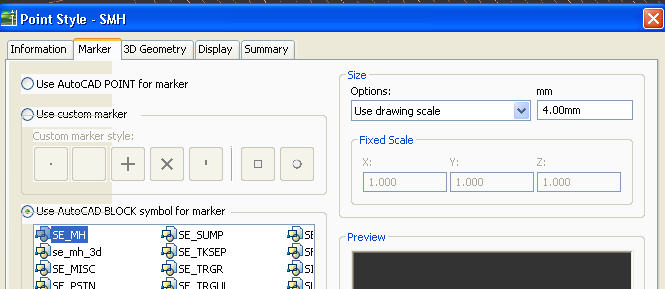
Thats it. Get these 2 right and your symbols will automatically scale in your viewport.
Labels with different Precisions
If you want to display point elevations to different levels of precision, you need to create separate label styles. The easiest way to create a new label style is to copy one that is very similar. Here we will copy the label style that only shows the elevation (and displays it to 2 decimal places) and create a new style that will display to 3 decimal places.
 |
Firstly, we copy the style RL ONLY and rename it to RL000 |
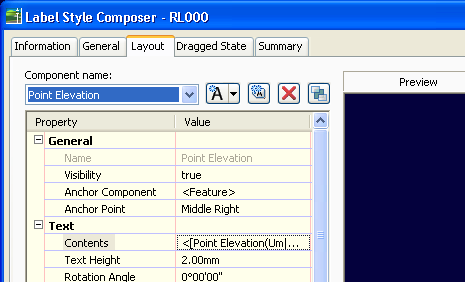 |
Then we change the contents... |
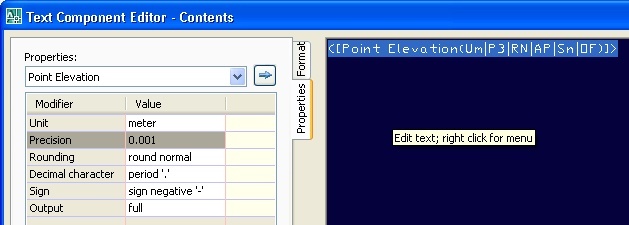 |
So that our precision is now 3 decimal places. |
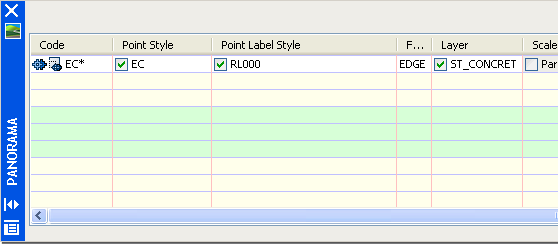 |
Then we go back to the Key Description Table and assign it |
The Video